Quick Start
If this is your first Raspberry Pi 5 NVMe setup, follow this order first. Do not start with EEPROM, boot order, or Gen 3.0 tuning until the SSD is detected at the normal baseline setup.
| Step | What to Do | Success Check |
|---|---|---|
| 1 | Confirm the SSD is an M-Key M.2 NVMe SSD. | Do not use M.2 SATA, M.2 PCIe AHCI, B-Key SSDs, Wi-Fi cards, or other non-NVMe M.2 devices. |
| 2 | Shut down Raspberry Pi 5 and unplug the power before installing the standoffs, FPC cable, NVMe HAT, and SSD. | The FPC cable is fully inserted and locked on both ends, and the SSD sits flat after the screw is installed. |
| 3 | Boot a current 64-bit Raspberry Pi OS release from a microSD card first. | Raspberry Pi OS starts normally before you try NVMe boot. |
| 4 | Enable PCIe in /boot/firmware/config.txt and reboot. | Raspberry Pi 5 reboots without error. |
| 5 | Run lspci and lsblk. | lspci shows an NVMe controller and lsblk shows a device such as nvme0n1. |
| 6 | Choose your goal: use the SSD as a data drive or boot from NVMe. | Data drive users should partition/format the SSD. Boot users should clone or flash Raspberry Pi OS to the NVMe SSD. |
Hardware Installation
Prepare a Raspberry Pi OS microSD
A working microSD card gives you a known-good operating system for the first hardware test. Prepare and verify it before assembling the NVMe HAT so you can confirm PCIe and SSD detection before changing the boot drive.
1. Download and install the official Raspberry Pi Imager from https://www.raspberrypi.com/software/
2. Insert a microSD card into your computer. In Raspberry Pi Imager, choose Raspberry Pi 5 as the device, select a current 64-bit Raspberry Pi OS release, and then select the microSD card as the storage target.
3. Open OS Customisation and create a username and password. Set a memorable hostname if you plan to connect without a monitor. You can also configure Wi-Fi, locale, and time zone.
Choose Your First Login Method
| Method | Configure in Raspberry Pi Imager | How to connect after boot |
|---|---|---|
| Monitor and keyboard | A username and password are required. SSH can remain disabled. | Connect a display and keyboard, wait for the login or desktop screen, then sign in with the account created in Imager. |
| Headless SSH | In OS Customisation > Remote Access, enable SSH and select password authentication or add your public key. | Connect Raspberry Pi 5 to your trusted local network, wait for it to boot, then use ssh username@hostname.local or the IP address from your router. |
Wired Ethernet normally connects automatically. If hostname.local does not resolve, find the Raspberry Pi IP address in your router client list. Do not expose SSH directly to the public Internet.
ssh username@hostname.local4. Check the selected storage name and capacity one more time. Warning: Raspberry Pi Imager permanently erases the selected storage device.
5. Choose Write and wait for both writing and verification to finish successfully. Safely eject the microSD card, install it in Raspberry Pi 5, and use it for the first boot and NVMe detection test.
First Boot Check
Connect a monitor and keyboard, or connect by SSH if you enabled it in Raspberry Pi Imager. Confirm that Raspberry Pi OS starts normally from the microSD card before enabling PCIe or attempting NVMe boot. If the Pi does not boot from this card, fix the microSD or operating-system setup before troubleshooting the NVMe HAT.
Before Installation
Shut down Raspberry Pi 5 completely and disconnect the power supply. Do not install or remove the HAT while the Raspberry Pi is powered.
Prepare the Raspberry Pi 5, NVMe HAT, 40 mm PCIe FPC cable, M.2 NVMe SSD, standoffs, screws, and optional 2-pin power cable.
Check the SSD label and connector carefully. This board requires an M-Key NVMe SSD. Do not use M.2 SATA SSDs.
Quick Hardware Checklist
| Check | What Good Looks Like |
|---|---|
| Power | Raspberry Pi 5 is fully shut down and unplugged before you touch the HAT, SSD, FPC cable, or 2-pin cable. |
| SSD type | The SSD is M-Key NVMe. It is not M.2 SATA, AHCI, B-Key, Wi-Fi, cellular, or another non-NVMe M.2 module. |
| FPC cable | The end marked RPI5 goes to Raspberry Pi 5. The end marked HAT goes to the NVMe HAT. Both connector latches are locked. |
| Mounting | Standoffs and screws are installed, the SSD sits flat, and no screw or case part touches exposed components. |
| First boot | Test outside the case first. After NVMe detection works, install the assembly into the final case and test again. |
Hardware Interface
PCIe FPC connector: connects the Raspberry Pi 5 PCIe port to the NVMe HAT. The cable must be fully inserted and locked on both ends.
M.2 M-Key socket: accepts M-Key NVMe SSDs only. Do not force a SATA, AHCI, B-Key, or non-NVMe module into the socket.
SSD mounting positions: use the correct screw point for 2230, 2242, 2260, or 2280 SSD length. The SSD should sit flat after tightening the screw.
PWR/ACT indicator area: the power/activity LEDs help confirm that the board is powered and that storage activity may be occurring. LED behavior can vary by firmware and system state.
2-pin auxiliary power input: use only when the SSD needs additional current support. Follow the board polarity marking exactly.
FPC Cable Direction
Use the included custom FPC cable. Connect the end marked RPI5 to the Raspberry Pi 5 PCIe connector, and connect the end marked HAT to the NVMe HAT V2 connector. The FPC cable must be fully inserted and locked down on both ends.


Hardware Installation Steps
Step 1
Install your own cooler first.
Power Input and Current Notes
The Raspberry Pi 5 PCIe/FPC path can power many low-power NVMe SSDs in normal use, but some high-capacity or high-performance SSDs can draw more current during boot, large transfers, or thermal recovery.
If the SSD disappears, fails during file copy, boots slowly, freezes the system, or causes filesystem errors, power stability should be checked along with SSD compatibility.
Power Notes
Use the official Raspberry Pi 5 power supply or another high-quality USB-C power supply that can provide stable current. Avoid weak phone chargers, low-quality USB-C cables, and unpowered USB hubs during setup.
The included 2-pin power cable is only for the board auxiliary 5V input. Use it when the SSD appears unstable, disappears under load, or needs extra current support. It is not a data cable and it is not a replacement for the Raspberry Pi 5 USB-C power input.
2-Pin Power Decision Guide
| Situation | Recommended Action |
|---|---|
| Normal setup with a low-power NVMe SSD and stable Raspberry Pi 5 power supply | Start without the 2-pin auxiliary power cable. Confirm detection first. |
| SSD disappears, freezes, fails during large file copies, or becomes unstable under load | Check SSD compatibility and power. The 2-pin 5V auxiliary input may help provide extra power headroom. |
| You decide to use the 2-pin auxiliary power cable | Follow the board polarity marking exactly. Do not guess polarity from wire color alone. |
| You need to change any cable or hardware | Shut down and unplug Raspberry Pi 5 first. Do not connect or disconnect the HAT while powered. |
If you use the 2-pin auxiliary power input, connect it only according to the board polarity marking. Do not guess polarity from wire color alone.
Dedicated 5V Power Input
Video Guide
Watch the installation video before powering on the Raspberry Pi 5 if this is your first time installing the NVMe HAT.
Important Physical Checks
The FPC cable must be fully inserted. A loose or reversed cable is one of the most common reasons for NVMe detection failure.
Make sure metal case parts, heatsinks, screws, or the SSD do not touch exposed components in a way that could cause a short circuit.
If the board is installed in a case, test the NVMe HAT outside the case first. After confirming it works, install it into the case and test again.
Software Installation
Driver Requirement
No separate driver is normally required when using a current Raspberry Pi OS release. The NVMe HAT uses the Raspberry Pi 5 PCIe interface. The software setup is mainly enabling PCIe and preparing the NVMe SSD for storage or boot.
Choose Your Setup Goal
| Goal | Best First Path |
|---|---|
| I only want extra storage | Enable PCIe, confirm the SSD appears with lspci and lsblk, then partition and format the SSD as a data drive. |
| I want Raspberry Pi 5 to boot from NVMe | First boot from microSD, enable PCIe, confirm NVMe detection, then clone the system to NVMe with Raspberry Pi OS SD Card Copier or flash Raspberry Pi OS directly to the NVMe SSD. |
| I want the highest possible speed | First make sure the setup is stable at default Gen 2.0. Only after that, advanced users may test dtparam=pciex1_gen=3. |
Enable PCIe
Edit the Raspberry Pi OS configuration file:
sudo nano /boot/firmware/config.txtAdd this line:
dtparam=pciex1Save the file and reboot:
sudo rebootCheck Detection
After rebooting, run:
sudo apt install -y pciutils
lspci
lsblk
Use lspci to check whether a PCIe NVMe controller appears. If lspci is not available, install pciutils first. Use lsblk to check whether the NVMe storage device appears as a block device. If lspci shows nothing related to NVMe and lsblk does not show the drive, recheck the FPC cable, SSD type, and PCIe configuration.
What Success Looks Like
A healthy lspci result should contain an NVMe or Non-Volatile memory controller entry. A healthy lsblk result should show an NVMe device name such as nvme0n1. Exact names vary by SSD and OS, but these two checks tell you whether PCIe sees a controller and whether Linux sees a usable block device.
Successful Detection Example
After enabling PCIe and rebooting, the exact output depends on SSD brand, Raspberry Pi OS version, and whether the SSD already has partitions. If you see output similar to this, the NVMe HAT and SSD are being detected.
$ lspci
0001:01:00.0 Non-Volatile memory controller: NVMe SSD Controller

$ lsblk
NAME        MAJ:MIN RM   SIZE RO TYPE MOUNTPOINTS
mmcblk0     179:0    0  59.5G  0 disk
mmcblk0p1   179:1    0   512M  0 part /boot/firmware
mmcblk0p2   179:2    0    59G  0 part /
nvme0n1     259:0    0 238.5G  0 disk
nvme0n1p1   259:1    0 238.5G  0 part
The PCI address 0001:01:00.0 is an example, not a required exact match. PCI domain and bus numbering can vary; look for the NVMe controller entry and the NVMe block device.
If lspci shows a Non-Volatile memory controller or NVMe controller and lsblk shows nvme0n1 or a similar nvme device, the HAT, FPC cable, PCIe setting, and SSD are being detected correctly. This does not automatically mean the SSD is formatted, mounted, or bootable yet. If lspci sees an NVMe controller but lsblk does not show a disk, suspect SSD compatibility, SSD power, or SSD firmware behavior.
Expected Command Checks
| Command | Healthy Result | If Not Healthy |
|---|---|---|
lspci | Shows a PCIe storage/NVMe controller or SSD controller entry | Recheck PCIe enable setting, FPC cable seating/direction, SSD type, and EEPROM PCIE_PROBE setting. |
lsblk | Shows an NVMe block device such as nvme0n1 after the SSD is detected | If lspci shows a controller but lsblk shows no disk, suspect SSD compatibility, SSD power, or SSD firmware behavior. |
vcgencmd bootloader_version | Shows a current Raspberry Pi 5 bootloader date | If the bootloader is old or NVMe boot is unreliable, update EEPROM with the official Raspberry Pi OS method. |
| findmnt -T /mnt/nvme | SOURCE identifies an NVMe partition for the directory you plan to test | If SOURCE is a microSD partition, the NVMe is not mounted there. Do not benchmark until the tested directory is on NVMe. |
Use as a Data Drive
Use this path if you want to keep booting Raspberry Pi OS from the microSD card and use the NVMe SSD only for files, projects, Docker data, databases, or downloads.
lsblk before running mkfs. Do not format mmcblk0 because that is normally the microSD card.Data Drive Setup
If the NVMe SSD is new, it may not appear in the file manager until it is partitioned, formatted, and mounted. The steps below are for a blank NVMe with no existing partitions and create one ext4 Linux storage partition. If lsblk already shows partitions, stop here; do not format an existing partition using this blank-drive example.
Step 1: Find the NVMe Device
lsblk -o NAME,SIZE,MODEL,FSTYPE,MOUNTPOINTSVerify the NVMe model and capacity. This example uses /dev/nvme0n1 with no partition entries beneath it; do not copy the name blindly if your verified device has a different name.
Step 2: Create a Partition
sudo fdisk /dev/nvme0n1For the verified blank drive, enter g to create a GPT partition table, n to create a partition, accept partition number 1 and the default first and last sectors, then enter w to write the change. Enter q instead of w to leave without saving.
Step 3: Format as ext4
Run lsblk again:
lsblk -o NAME,SIZE,MODEL,FSTYPE,MOUNTPOINTSConfirm that /dev/nvme0n1p1 is the new partition on the verified NVMe and is not mounted. Stop if the device or partition differs from this example; identify the correct new partition before formatting.
sudo mkfs.ext4 /dev/nvme0n1p1Step 4: Mount the Drive
sudo mkdir -p /mnt/nvme
sudo mount /dev/nvme0n1p1 /mnt/nvme
df -h /mnt/nvme
Step 5: Allow User Writes
sudo chown "$USER":"$USER" /mnt/nvmeAfter this, you can use /mnt/nvme as a normal storage folder. For automatic mounting after reboot, advanced users can check the partition UUID with blkid and add a UUID-based entry to /etc/fstab.
Automatic Mounting with UUID
Use this only for the ext4 data-drive partition created above. Do not add this /mnt/nvme entry when the NVMe is your Raspberry Pi OS boot drive. Use the filesystem UUID instead of a device name such as /dev/nvme0n1p1 because Linux device names can change. The mount directory /mnt/nvme must already exist from Step 4 above.
Step 1: Get the Filesystem UUID
sudo blkid /dev/nvme0n1p1Copy only the UUID value for the verified NVMe partition. Confirm the device model and capacity with lsblk again if you are not certain which partition belongs to the NVMe SSD.
Step 2: Add the Mount Entry
sudo nano /etc/fstabAdd one line at the end, replacing YOUR-UUID with the exact UUID returned by blkid:
UUID=YOUR-UUID /mnt/nvme ext4 defaults,nofail 0 2In nano, press Ctrl+O, press Enter to save, and then press Ctrl+X.
Step 3: Verify Before Rebooting
sudo findmnt --verify
sudo mount -a
findmnt /mnt/nvme
Do not reboot until sudo findmnt --verify and sudo mount -a complete without an error. After rebooting, run findmnt /mnt/nvme again to confirm that the SSD mounted automatically.
NVMe Boot Step-by-Step
Choose one setup goal only. If you plan to boot from NVMe, do not partition, format, mount, or add the SSD to /etc/fstab as a data drive first. Raspberry Pi Imager and SD Card Copier both overwrite the selected target.
Before Writing: Prepare EEPROM for NVMe Boot
Complete these steps while Raspberry Pi OS is still running from the known-good microSD card and after lspci and lsblk detect the NVMe. Do not postpone the EEPROM settings until after the first NVMe-only boot.
1. Update Raspberry Pi OS and the packaged EEPROM firmware, then reboot:
sudo apt update
sudo apt full-upgrade -y
sudo rpi-eeprom-update -a
sudo reboot
2. Follow the Raspberry Pi official Boot from PCIe method. Open the persistent EEPROM configuration:
sudo rpi-eeprom-config --editReplace the existing BOOT_ORDER line and add or update PCIE_PROBE so the configuration contains these two lines. Keep all other settings unchanged; do not add duplicate entries:
BOOT_ORDER=0xf416
PCIE_PROBE=1
BOOT_ORDER is read from right to left: 0xf416 tries NVMe, then microSD, then USB, and repeats. INV001 is a non-HAT+ PCIe device, so PCIE_PROBE=1 is required for bootloader PCIe probing.
Official reference: https://www.raspberrypi.com/documentation/computers/raspberry-pi.html#boot-from-pcie
3. Save and exit the editor, then run sudo reboot to apply the EEPROM changes. After reboot, run sudo rpi-eeprom-config and confirm BOOT_ORDER=0xf416 and PCIE_PROBE=1 are present before continuing.
4. Run lsblk -o NAME,SIZE,MODEL,FSTYPE,MOUNTPOINTS and confirm / is still on microSD before writing the NVMe. An SSD that already contains a bootable OS may start first with this boot order. If / is on NVMe, stop; never overwrite the running system. Run lspci again and verify the correct SSD model and capacity.
Method 1: Write a Fresh OS with Raspberry Pi Imager (Recommended)
These graphical steps require Raspberry Pi OS Desktop. If you use headless SSH or Raspberry Pi OS Lite, use the computer-and-adapter method below after completing the same EEPROM preparation.
1. While Raspberry Pi OS Desktop is running from microSD, open Terminal on the Raspberry Pi, then install and open Raspberry Pi Imager:
sudo apt install -y rpi-imager
rpi-imager
2. Choose a current 64-bit Raspberry Pi OS image and select the verified NVMe SSD as the target. In OS Customisation, set the hostname, username, password, and network settings for this new system; enable SSH if you will connect remotely. The microSD login and SSH settings are not copied into a fresh image. Warning: Imager erases the selected target.
3. After writing completes, run sudo poweroff, wait for activity to stop, disconnect power, and remove the microSD card.
4. Reconnect power and boot from NVMe. After login, run lsblk and confirm / and /boot/firmware are mounted from nvme0n1 partitions.
For headless SSH or Raspberry Pi OS Lite, complete the EEPROM boot-order and PCIE_PROBE=1 steps above while still running from microSD. Then run sudo poweroff, disconnect power, and remove the NVMe SSD from the HAT.
Connect the SSD to your Windows, macOS, or Linux computer with a USB-to-NVMe adapter. In Raspberry Pi Imager, write the same current 64-bit Raspberry Pi OS image to the verified SSD, configuring the new username, password, hostname, network, and SSH settings before writing.
Safely eject the SSD from the computer. With Raspberry Pi power still disconnected, reinstall it in the HAT and remove the microSD card. Reconnect power, log in, and use lsblk to confirm / and /boot/firmware are mounted from NVMe partitions. Writing the SSD on another computer does not configure the Raspberry Pi EEPROM.
Alternative: Clone the Existing microSD System
Use Raspberry Pi OS SD Card Copier only when you want the NVMe to contain a copy of the already configured microSD system.
1. Confirm that the microSD system includes dtparam=pciex1 in /boot/firmware/config.txt and that lspci and lsblk detect the NVMe.
2. Open SD Card Copier, select the microSD card as the source, and select the verified NVMe SSD as the target.
3. Complete the copy, run sudo poweroff, wait for activity to stop, disconnect power, and remove the microSD card.
4. Boot from NVMe and confirm / and /boot/firmware are mounted from nvme0n1 partitions.
EEPROM and Boot Order
If the SSD is detected but does not boot, confirm that the Raspberry Pi 5 bootloader EEPROM is current, the boot order includes NVMe, and PCIE_PROBE=1 remains present. Do not download or flash random EEPROM files from third-party sites for normal setup.
When to Update EEPROM
Use the official EEPROM update method when the NVMe SSD is detected by hardware checks but will not boot, when your Raspberry Pi 5 bootloader is old, when boot order settings are missing, or when Raspberry Pi OS recommends a bootloader update. Also update EEPROM after you have already checked the FPC cable, SSD type, power supply, and OS configuration.
Raspberry Pi documentation recommends updating Raspberry Pi OS first, selecting the latest bootloader with raspi-config when needed, then using rpi-eeprom-update to schedule the update. This keeps the bootloader aligned with the official Raspberry Pi OS package instead of locking users to an old bundled file.
Useful commands:
sudo apt update
sudo apt full-upgrade
sudo rpi-eeprom-update -a
vcgencmd bootloader_version
To edit EEPROM configuration:
sudo rpi-eeprom-config --editSet Boot Order
Use the same manual EEPROM method in Before Writing: Prepare EEPROM for NVMe Boot above. This guide uses BOOT_ORDER=0xf416 together with PCIE_PROBE=1; save, reboot, and read back the configuration with sudo rpi-eeprom-config.
If you previously used raspi-config, a different value does not necessarily mean an error. For example, 0xf461 tries microSD, NVMe, then USB; 0xf146 tries NVMe, USB, then microSD. Both include NVMe, but neither has exactly the same priority as 0xf416. Do not run the Boot Order menu again after applying this guide if you want to keep the same order.
Update EEPROM Firmware
1. Make sure Raspberry Pi 5 is connected to the Internet.
2. Check the current bootloader version:
vcgencmd bootloader_version3. Update packages and EEPROM firmware:
sudo apt update
sudo apt full-upgrade -y
sudo rpi-eeprom-update -a
4. Reboot, then run vcgencmd bootloader_version again to confirm the update.
Low-Power Shutdown Setting
If the board LEDs or attached SSD continue to draw more standby power than expected after shutdown, edit the EEPROM configuration and set POWER_OFF_ON_HALT=1.
sudo rpi-eeprom-config -ePOWER_OFF_ON_HALT=1
Optional PCIe Gen 3.0
This board can be used in PCIe Gen 3.0 mode on compatible Raspberry Pi 5 and SSD combinations. Raspberry Pi 5 is not guaranteed to be stable with every device at Gen 3.0 speed, so use Gen 2.0 as the baseline for troubleshooting. To try Gen 3.0, add:
dtparam=pciex1_gen=3dtparam=pciex1_gen=3 and use default PCIe Gen 2.0 mode.Performance Test
This optional test writes and reads a 1 GiB temporary file. Use a writable directory on NVMe with at least 2 GiB free. The example uses the data-drive mount /mnt/nvme; if Raspberry Pi OS boots from NVMe, substitute a writable directory on that NVMe filesystem.
How to Run a Clean Benchmark
1. Check which filesystem actually contains the test directory:
findmnt -T /mnt/nvme -o SOURCE,TARGET,FSTYPEContinue only if SOURCE is an NVMe partition such as /dev/nvme0n1p1. A path printed by pwd alone does not prove the NVMe is mounted. If findmnt fails or shows a microSD partition, stop and correct the mount first.
2. Change to the verified directory and check its available space. Stop if changing directory fails:
cd /mnt/nvme
df -h .
3. Run the write/read test. The write command stops if the temporary filename already exists; the read command bypasses the input cache:
dd if=/dev/zero of=iuniker-nvme-test.bin bs=1M count=1024 conv=excl,fsync status=progress
dd if=iuniker-nvme-test.bin of=/dev/null bs=1M iflag=direct status=progress
4. If the test succeeded, remove the temporary file it created. If either command reported an error, stop and do not run this cleanup command:
rm iuniker-nvme-test.binPerformance depends on SSD model, SSD firmware, SSD temperature, filesystem, power supply, PCIe mode, Raspberry Pi OS version, and system load.
Benchmark Reference
The numbers below are reference ranges for a healthy Raspberry Pi 5 NVMe setup. They are not a fixed product guarantee and should not be used as the only pass/fail test. Some SSDs will be slower, some faster, and unstable Gen 3.0 setups should be returned to Gen 2.0.
| Mode | Reference Sequential Result | Best Use | Notes |
|---|---|---|---|
| PCIe Gen 2.0 x1 | Roughly 200-450 MB/s in simple dd-style sequential tests | Recommended baseline | Stable starting point for most customers. If the system is unstable, test here first. |
| PCIe Gen 3.0 x1 | Roughly 600-750 MB/s in simple dd-style sequential tests on compatible SSDs | Optional advanced mode | Raspberry Pi 5 is not guaranteed stable with every SSD at Gen 3.0. Remove dtparam=pciex1_gen=3 if boot, lag, or filesystem problems appear. |
| Around 50-100 MB/s | Usually suspicious for an NVMe benchmark | Troubleshooting signal | Often means the test is running on the microSD card, the SSD is not mounted where you think it is, or the SSD/power setup is unstable. Check lsblk and findmnt -T . before retesting. |
Performance Expectations
| Setup | What to Expect | Notes |
|---|---|---|
| microSD card | Usually much slower than NVMe | Exact speed depends on the card. Do not compare NVMe results to a slow or counterfeit microSD card as a product fault. |
| Raspberry Pi 5 PCIe Gen 2.0 x1 | Stable baseline for most users | Raspberry Pi 5 external PCIe defaults to Gen 2.0 class operation. Real file transfer speed depends on SSD, filesystem, power, temperature, and test method. |
| Raspberry Pi 5 PCIe Gen 3.0 x1 | May be faster, but not guaranteed stable | Use only after the setup works at Gen 2.0. If there is lag, boot failure, filesystem error, or disappearing SSD, remove dtparam=pciex1_gen=3. |
| Very low results such as around microSD speed | Often indicates the test is running on the microSD card or another filesystem, not the mounted NVMe SSD | Before testing, use findmnt -T . to confirm the working directory is on the NVMe filesystem. |
Troubleshooting Decision Tree
| Symptom | Most Likely Area | What to Do First |
|---|---|---|
lspci shows no NVMe device | PCIe config, FPC cable direction/seating, SSD seating, or EEPROM PCIe probing | Shut down and unplug the power before reseating both FPC cable ends. Confirm dtparam=pciex1, test outside the case, and check whether PCIE_PROBE=1 is needed for boot. |
lspci shows NVMe but lsblk does not show nvme0n1 | SSD compatibility, SSD firmware, SSD power, or SSD controller behavior | Try another known-good low-power NVMe SSD, return to PCIe Gen 2.0, and check whether auxiliary 5V power is needed. |
lsblk shows the SSD but the file manager does not | Blank or unformatted SSD | Create a partition and filesystem before using it as a data drive. |
| SSD is detected but will not boot | OS image, EEPROM, boot order, or PCIe not enabled inside the NVMe OS | Confirm the SSD contains Raspberry Pi OS, update EEPROM through Raspberry Pi OS, and check boot order. |
| System is slow, freezes, or drops the SSD | Gen 3.0 instability, heat, power supply, or SSD controller compatibility | Remove dtparam=pciex1_gen=3, test default Gen 2.0, check temperature and power, then try another SSD if needed. |
Troubleshooting Checklist
Start with the simple checks first: confirm that Raspberry Pi OS is current, confirm PCIe is enabled, confirm the FPC cable is fully inserted, confirm the SSD is M-Key NVMe, confirm stable power, then check EEPROM and SSD compatibility.
A loose FPC cable or an unlocked connector latch is one of the most common causes of SSD detection failure. Compare your cable position with the image below before changing software settings.
SSD Not Detected
Shut down Raspberry Pi 5 and unplug the power before reseating the FPC cable on both ends and the NVMe SSD. Confirm the SSD is installed in the M-Key socket, then reconnect power and boot again. Run lspci and lsblk after reboot.
lspci Shows No NVMe Device
This usually points to PCIe not being enabled, an FPC cable seating/direction issue, a missing SSD, or a PCIe negotiation issue. Recheck /boot/firmware/config.txt, test outside the case, and try another known-good NVMe SSD.
lsblk Does Not Show the Drive
If lspci shows an NVMe controller but lsblk does not show a disk, the SSD may be incompatible, underpowered, failed, or not responding correctly to the Raspberry Pi 5 PCIe link. Try a different SSD and check whether auxiliary 5V power is needed.
SSD Is Detected but Will Not Boot
Confirm the NVMe SSD contains a bootable Raspberry Pi OS image, the OS on the NVMe drive has PCIe enabled, the EEPROM boot order includes NVMe boot, and PCIE_PROBE=1 is present if required by your setup.
System Is Slow or Unstable
Remove dtparam=pciex1_gen=3 and test again at default PCIe Gen 2.0 speed. Also check SSD temperature, power supply quality, 2-pin auxiliary power need, SSD controller compatibility, and whether your speed test is running on the NVMe drive instead of the microSD card.
New SSD Does Not Appear in File Manager
A blank SSD may be detected by lsblk but not shown as a usable drive until it has a partition and filesystem. Use Raspberry Pi OS disk tools or command-line partitioning tools to format the SSD before using it as a data drive.
What to Send Support
When asking for help, include your Amazon order ID, Raspberry Pi OS version, SSD brand/model/capacity, photos of the FPC cable orientation, and the output of uname -a, vcgencmd bootloader_version, lspci, and lsblk.
Product Overview
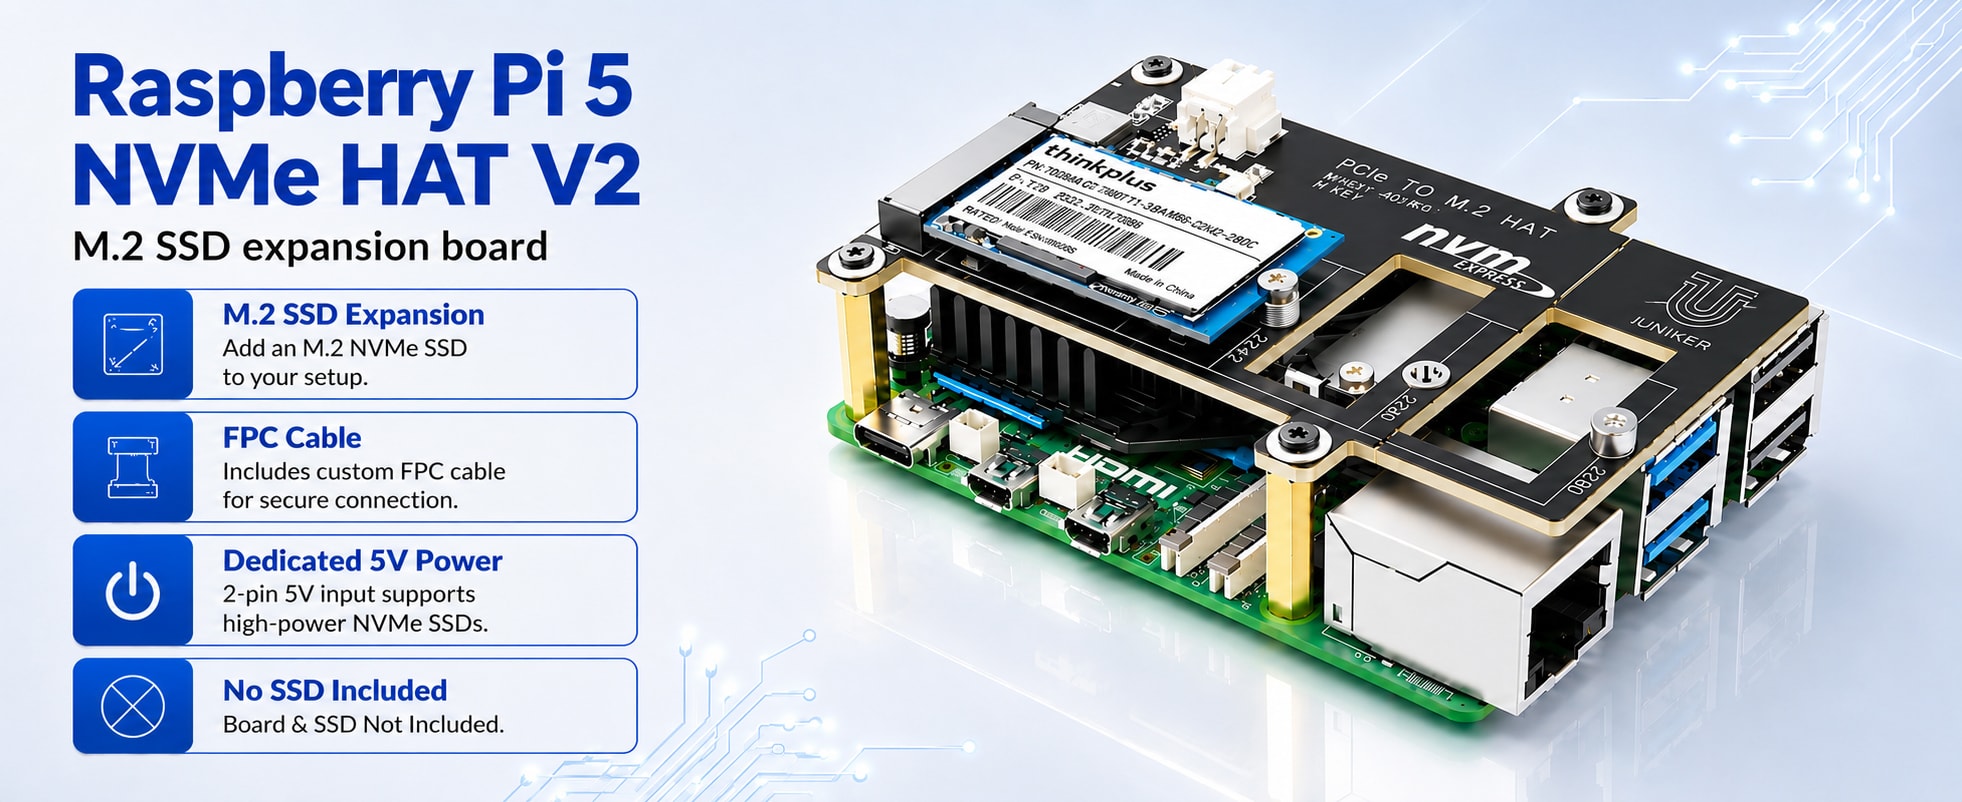
The iUniker INV001 Raspberry Pi 5 NVMe HAT V2 is a PCIe to M.2 NVMe expansion board for Raspberry Pi 5. It uses the Raspberry Pi 5 PCIe interface to add fast M.2 NVMe storage for boot-drive builds, desktop-style Raspberry Pi setups, home lab projects, and maker applications.
This page is the iUniker NVMe HAT V2 setup guide for Raspberry Pi 5. It covers hardware installation, PCIe enablement, NVMe detection checks, NVMe boot setup, downloads, Q&A, and troubleshooting.
The board supports common M-Key M.2 NVMe SSD sizes: 2230, 2242, 2260, and 2280. This makes it suitable for compact embedded projects as well as full-length 2280 SSD storage upgrades.
The package includes the NVMe HAT, a custom FPC cable for the Raspberry Pi 5 PCIe connector, an extra 2-pin power cable, screws, and mounting hardware. The extra 2-pin cable is included for setups that use the board auxiliary power connection; follow the board markings and do not reverse polarity.
This product is for M-Key NVMe SSDs only. It does not support M.2 SATA SSDs, M.2 PCIe AHCI SSDs, B-Key SSDs, or other non-NVMe M.2 devices.
When to Use This Board
Use this NVMe HAT when you want Raspberry Pi 5 to boot from NVMe, run applications from faster storage, reduce SD card wear, build a compact NAS or home server, or create a more reliable storage setup for development and maker projects.
For a current Raspberry Pi OS setup, no additional Linux driver is required. The most important steps are correct physical installation, enabling PCIe, using a compatible NVMe SSD, and keeping the Raspberry Pi bootloader EEPROM reasonably up to date.
Product Images
Key Features
- Designed specifically for Raspberry Pi 5 PCIe storage expansion
- PCIe to M.2 NVMe SSD adapter board
- Supports M-Key M.2 NVMe SSDs
- Supports 2230 / 2242 / 2260 / 2280 SSD sizes
- Includes custom FPC cable for Raspberry Pi 5 PCIe connector
- Includes extra 2-pin power cable for SSD power support flexibility
- Supports Raspberry Pi 5 NVMe boot after correct system setup
- Supports PCIe Gen 3.0 mode on compatible Raspberry Pi 5 and SSD combinations
- Works with a current Raspberry Pi OS release without a separate driver in most setups
- Suitable for boot-drive, desktop, home lab, NAS, and maker projects
- Designed to allow Raspberry Pi 5 Active Cooler or heatsink-style setups when assembly clearance permits
- Compatible with multiple NVMe SSD capacities; actual capacity support depends on the SSD and operating system
Package Contents
Compatibility
Compatible Host Board
Raspberry Pi 5. This board is not for Raspberry Pi 4, Raspberry Pi 3, Raspberry Pi Zero, or older Raspberry Pi boards because those boards do not expose the same Raspberry Pi 5 PCIe connector.
Supported SSD Type
Use M-Key M.2 NVMe SSDs only. The SSD must be NVMe. M.2 SATA SSDs, M.2 PCIe AHCI SSDs, B-Key SSDs, and other non-NVMe M.2 devices are not supported even if the connector shape looks similar.
Supported SSD Sizes
Supported lengths: 2230, 2242, 2260, and 2280.
Board Dimensions
Approximate board dimensions shown in the product image: 87.2 mm x 56 mm, with a 65 mm top mounting span and 43.3 mm lower section width.
Cooling and Stacking Clearance
The installed assembly image shows approximately 19 mm total stacking height and about 16 mm reserved cooling clearance, depending on the Raspberry Pi 5, cooler, screws, SSD, and final assembly.
Operating System
Use a current 64-bit Raspberry Pi OS release. Older releases may not include the Raspberry Pi 5 PCIe and NVMe boot behavior expected by this guide.
Cooler and Case Notes
The board is designed for Raspberry Pi 5 Active Cooler and many passive or active cooler setups when installed with suitable clearance. Always check the full assembly before powering on. Make sure the FPC cable, SSD, screws, cooler, and case do not press against each other or create a short circuit.
SSD Compatibility Notes
NVMe compatibility depends on the Raspberry Pi 5 firmware, the SSD controller, SSD firmware, power stability, and PCIe speed. If one SSD is not detected or is unstable, test with another known-good NVMe SSD before assuming the HAT is faulty.
Some NVMe SSD controllers are known to behave poorly with Raspberry Pi 5 PCIe Gen 2 or Gen 3. Symptoms can include no detection, slow boot, system lag, filesystem errors, or freezes during large file transfers.
Known SSD Compatibility Risks
Avoid assuming that every M-Key NVMe SSD will work perfectly with Raspberry Pi 5. Raspberry Pi 5 PCIe compatibility depends heavily on the SSD controller and firmware, not only on this adapter board.
Models and controller families that have been widely reported by Raspberry Pi 5 NVMe users as risky include some Phison-controller SSDs, some MAP1202-controller SSDs, WD Blue SN580, WD Blue SN5000, WD Black SN770, WD Black SN850/SN850 series, WD SN740, WD SN810, Kingston NV3, Corsair MP600, Inland TN446, Fanxiang S500 Pro, Micron 2450, and Micron 2200. Compatibility can change after Raspberry Pi EEPROM or SSD firmware updates, so this list should be treated as a practical warning list rather than a permanent pass/fail guarantee.
If your SSD is not detected, first test with a common low-power NVMe SSD from another brand before replacing the HAT. If the replacement SSD works, the original SSD is likely a controller, firmware, or power compatibility issue.
SSD Compatibility Table
| Status | Device or SSD Type | Notes |
|---|---|---|
| Recommended first test | Standard low-power M-Key NVMe SSDs from common brands | Use a known-good SSD when troubleshooting. Compatibility still depends on SSD controller firmware, Raspberry Pi EEPROM, OS version, power supply, and PCIe speed. |
| Supported interface | M-Key M.2 NVMe SSD | This adapter is for NVMe only. Supported lengths are 2230, 2242, 2260, and 2280. |
| Reported-risk SSDs | Some Phison-controller or MAP1202-controller SSDs; reported-risk examples include WD Blue SN580, WD Black SN770/SN850, Kingston NV3, Corsair MP600, Inland TN446, Fanxiang S500 Pro, Micron 2450, and Micron 2200 | These are practical caution examples gathered from Raspberry Pi 5 NVMe community reports. They are not a permanent guarantee because firmware updates may change behavior. |
| Not supported | M.2 SATA SSD, M.2 PCIe AHCI SSD, B-Key SSD, Wi-Fi card, cellular card, or other non-NVMe M.2 module | Connector shape alone is not enough. The device must be M-Key NVMe. |
Other Incompatibility Notes
M.2 SATA SSDs, M.2 PCIe AHCI SSDs, B-Key SSDs, Wi-Fi cards, cellular cards, and other non-NVMe M.2 devices are not supported. A new blank NVMe SSD may also need to be partitioned and formatted before it appears as usable storage in Raspberry Pi OS.
Downloads
PDF Manual
Printable customer manual with quick start, hardware installation, PCIe setup, NVMe boot, EEPROM update, performance test, and troubleshooting steps.
Download PDFDXF Mechanical Drawing
DXF
AutoCAD 2007 DXF mechanical drawing for enclosure planning, mounting reference, and integration checks.
DownloadQ&A
QDoes this board support Raspberry Pi 4?+
No. This NVMe HAT is designed for Raspberry Pi 5 because it uses the Raspberry Pi 5 PCIe connector.
QDoes it support M.2 SATA SSDs?+
No. It supports M-Key M.2 NVMe SSDs only. M.2 SATA SSDs, AHCI SSDs, and B-Key M.2 SSDs are not supported.
QWhich SSD sizes are supported?+
It supports 2230, 2242, 2260, and 2280 M.2 NVMe SSD sizes.
QIs a driver required?+
No separate driver is normally required on a current Raspberry Pi OS release. Enable PCIe in /boot/firmware/config.txt and reboot.
QWhy is my SSD not detected?+
Check that the SSD is an M-Key NVMe SSD, the FPC cable is inserted in the correct direction, PCIe is enabled, the Raspberry Pi OS version supports Pi 5 PCIe, the EEPROM is updated, and the power supply is stable. Then check with lspci and lsblk.
QWhy does lspci show nothing?+
Usually this means PCIe is not enabled, the FPC cable is not seated correctly, the SSD is not installed correctly, or the SSD is incompatible. Shut down and unplug the power before reseating the cable and SSD.
QWhy does lsblk not show the SSD?+
If lspci shows an NVMe controller but lsblk does not show a disk, the SSD may be incompatible, not powered properly, or failing. Try another NVMe SSD and check power stability.
QWhy can I see the SSD but not boot from it?+
The SSD may not contain a valid Raspberry Pi OS image, the boot order may not include NVMe, EEPROM may need updating, or PCIe may not be enabled in the OS on the NVMe drive.
QCan I use PCIe Gen 3.0?+
The board supports Gen 3.0 mode on compatible setups, but Raspberry Pi 5 is not officially certified for Gen 3.0. If the system becomes unstable, remove dtparam=pciex1_gen=3 and use Gen 2.0.
QWhy is performance slow?+
Slow performance can be caused by Gen 2 mode, SSD thermal throttling, SSD compatibility, low power, filesystem activity, or a poor test method. Confirm the SSD is detected correctly and test with a stable power supply.
QCan I use the official Raspberry Pi 5 Active Cooler?+
The product is designed to support Raspberry Pi 5 Active Cooler and heatsink-style setups, but final clearance depends on your full assembly, SSD size, cable routing, and case.
QWhat is the 2-pin power cable for?+
The included 2-pin cable is for the board XH2.54 5V auxiliary input. Use it only when the SSD needs additional current support, connect it to Raspberry Pi 5 5V GPIO as indicated by the board marking, and do not reverse polarity.
QMy SSD is new and does not appear in the file manager. Is it broken?+
Not necessarily. A new SSD may need to be partitioned and formatted before it appears as usable storage.
QShould I update EEPROM?+
Yes, if NVMe detection or boot is unreliable. Raspberry Pi 5 bootloader updates have improved PCIe and NVMe behavior over time.
QWhich SSDs should I avoid?+
Avoid SSDs that are widely reported as problematic with Raspberry Pi 5 PCIe, including some Phison-controller and MAP1202-controller models, plus reported-risk models such as WD Blue SN580, WD Black SN770/SN850, Kingston NV3, Corsair MP600, Inland TN446, Fanxiang S500 Pro, Micron 2450, and Micron 2200. Compatibility can change after firmware updates, so test another known-good SSD before assuming the HAT is faulty.
QWhat should I send to support if I need help?+
Send your Amazon order ID, Raspberry Pi OS version, SSD brand/model/capacity, clear photos of the FPC cable and 2-pin power connection, plus the output of uname -a, vcgencmd bootloader_version, lspci, and lsblk.
QWhen should I update the Raspberry Pi EEPROM?+
Update EEPROM when NVMe boot is unreliable, the SSD is detected but will not boot, your bootloader version is old, or Raspberry Pi OS recommends a bootloader update. Use the official Raspberry Pi OS commands instead of downloading a random third-party EEPROM file.
QDo I need to download an EEPROM file from this page?+
No for normal use. The recommended method is to update through Raspberry Pi OS with sudo apt update, sudo apt full-upgrade -y, sudo rpi-eeprom-update -a, and sudo reboot. A fixed EEPROM file can become outdated.
QWhy is my speed only around 50-100 MB/s?+
First confirm your benchmark is running on the mounted NVMe filesystem, not on the microSD card. Run lsblk, check your mount point, and run pwd before testing. Slow speed can also be caused by Gen 2 mode, SSD thermal throttling, power instability, or SSD compatibility.
QCan I use Ubuntu, Home Assistant OS, or another OS?+
The hardware may work with other operating systems, but this guide is written for a current Raspberry Pi OS release because Raspberry Pi OS provides the standard Raspberry Pi PCIe, EEPROM, raspi-config, and rpi-eeprom-update tools. Other OS setups may require different steps.
QCan I disable the PWR or ACT LEDs?+
This board does not provide a software switch for disabling the onboard indicator LEDs. If LED light is a concern, use non-conductive opaque tape only after confirming it will not trap heat or touch exposed components.
QShould I use PCIe Gen 2.0 or Gen 3.0?+
Use the default Gen 2.0 mode first. After the system is stable, advanced users may try dtparam=pciex1_gen=3. If you see instability, slow boot, filesystem errors, freezes, or disappearing SSD behavior, remove the Gen 3.0 setting.
Discussion
Comments can be edited or deleted from the same browser for 15 minutes after posting. For help, contact iuniker@yeah.net.
Neo
How to set gen3.0 ?